
Sourdough Margherita Pizza

Looking for a tasty way to use your sourdough discard? This sourdough margherita pizza recipe is exactly what you need. The pizza crust is airy, chewy, and full of delicious sourdough flavor that can’t be beat with commercial yeast.
Even better? This recipe is easy to double (or triple!) PLUS the dough freezes extremely well which means you will always have plenty of homemade, nutritious, and easy to digest sourdough crust on hand for pizza night. Grab your sourdough discard and let’s get some pizza made!
Note: you can use the dough to make any flavor pizza you wish; I will be giving the recipe for my favorite - margherita - here.
Sourdough Margherita Pizza
Yield: 500 grams of pizza dough (for 2 8-inch pizzas; multiply the recipe as you wish)
Dough Ingredients:
50 grams active sourdough starter discard (Don’t have discard and located near me? Send me an email and I’ll share!)
250 grams bread flour
175 grams filtered water
5 grams ancient fine sea salt
15 grams olive oil, divided
Pizza Topping Ingredients:
28 oz peeled and chopped organic San Marzano tomatoes (canned totally works if you don’t have fresh)
1 TBS minced fresh organic garlic
7 oz grass-fed buffalo mozzarella
3 TBS organic extra virgin olive oil, divided
1-4 oz fresh basil (amount depending on how much you like basil!)
Ancient fine sea salt to taste
Kitchen Equipment:
Digital kitchen scale
Mixing bowls
Parchment paper
Kitchen towels
1.5 Quart Stainless steel stock pot
Pizza cutter (hot tip: a salad chopper like this one always works better much better at making clean pizza cuts than a traditional rolling pizza cutter)
Directions - Dough Preparation
In a large mixing bowl, add sourdough starter, flour, and water. Mix to combine until there are no dry flour particles visible. Cover the bowl and let the dough rest for 30 minutes.
After the 30 min rest, add salt and ½ tablespoon olive oil and fold the dough for a few seconds to combine. Now you will begin a series of “stretch and folds” as follows:
Apply some water on your hands and stretch and fold the dough by folding the edges over to the center, one edge at a time. Wet hands makes it easier to work with the dough and it should take you less than a minute to fold the 4 sides. Cover with with a damp kitchen towel; allow dough to rest for 30 minutes.
Repeat the last step twice (stretch and fold followed by 30 minute rest). This means you will have done a total of 3 “stretch and folds” followed by 30 minute rests before you move on to the next step.
At this point the dough should almost have doubled in size after all the stretch and folds; now it is time to shape the dough:
Transfer dough to a floured surface and sprinkle dough with a little flour.
Divide the dough in half and shape each half into a tight ball by folding the edges over to the center. Stretch the dough a little and fold the 4 sides to the center like wrapping a present.
Turn the dough over and use your bench scraper to push the dough back and forth to create a tight ball. Repeat this motion until the surface of the dough appears tight.
Place the 2 dough balls a few inches apart in a lightly oiled airtight container.
Brush the remaining olive oil over the surface of the dough balls to prevent them from drying out. Close the container and place in the refrigerator overnight for 8 to 12 hours, or up to 3 days until you are ready to make pizza. (NOTE: if you don’t plan on making pizza right away do this: after 12 hours transfer each dough balls to an individual freezer-safe container and store in the freezer for up to 6 months. When you are ready to make pizza, thaw in the refrigerator, then proceed to the next step!)

Directions - Make Pizza!
Place pizza stone inside oven and preheat to 550 for at least 60 minutes (my oven is decidedly old and low-tech; if your oven heats quickly or you have a dedicated pizza oven, please use your discretion with times and temperatures).
While the pizza stone is pre-heating, it’s time to make the sauce:
To a 1.5 Quart Stainless Steel Stock pot, add 1TBS olive oil and minced garlic. Cook on medium-high until garlic is browned. Reduce heat to medium.
Add San Marzano tomatoes to the pot. Stirring frequently, cook for several minutes until tomatoes reach a simmer. While cooking and stirring, smash tomatoes against the side of the pot so their juices are released.
When the tomatoes have released their juice and tomatoes have softened, blitz mixture with the immersion blender on high until tomatoes are smooth.
Reduce heat to low, stirring occasionally, until sauce has reduced to your desired thickness.
During this time, add several pinches of ancient fine sea salt to the tomatoes to taste
Pizza stone is probably still pre-heating, so might as well prep the cheese and basil:
Remove buffalo mozzarella from container, place onto a plate lined with several kitchen towels and gently press out excess moisture. Divide cheese in half (each pizza will get one half of the cheese ball).
Remove basil leaves from stems and divide basil leaves in half; one half for each pizza.
ONLY once your oven and pizza stone are fully pre-heated, then it is time to shape the dough. Cold dough is MUCH easier to shape, so only remove dough from the refrigerator once the oven is hot and the sauce is ready.
Take pizza dough out of the fridge and move it to a floured surface (if you are making more than one pizza at a time, I recommend you leave the other balls of dough in the refrigerator until you are ready to shape/bake them).
Gently press the pizza dough with your fingers into an 8” circle, making the edges (which will be your crust) thicker than the center. This take some time and practice to get the hang of so don’t give up if you don’t quite get it on your first pizza; it will taste good no matter what, I promise! I have probably made about 100 pizzas at this point - most of them ugly but delicious - before I could actually feel comfortable sharing my process. (Tip: search “hand stretching pizza dough” on YouTube for some clever and useful tutorials).
NEVER USE A ROLLING PIN or a WINE BOTTLE or WHATEVER to shape your crust as this will smoosh all of the bubbles out of your dough, leaving you with a sad and heavy crust. HANDS ONLY. Trust me on this one.
Once your dough is shaped, gently transfer to a piece of parchment paper cut to the size of your pizza dough.

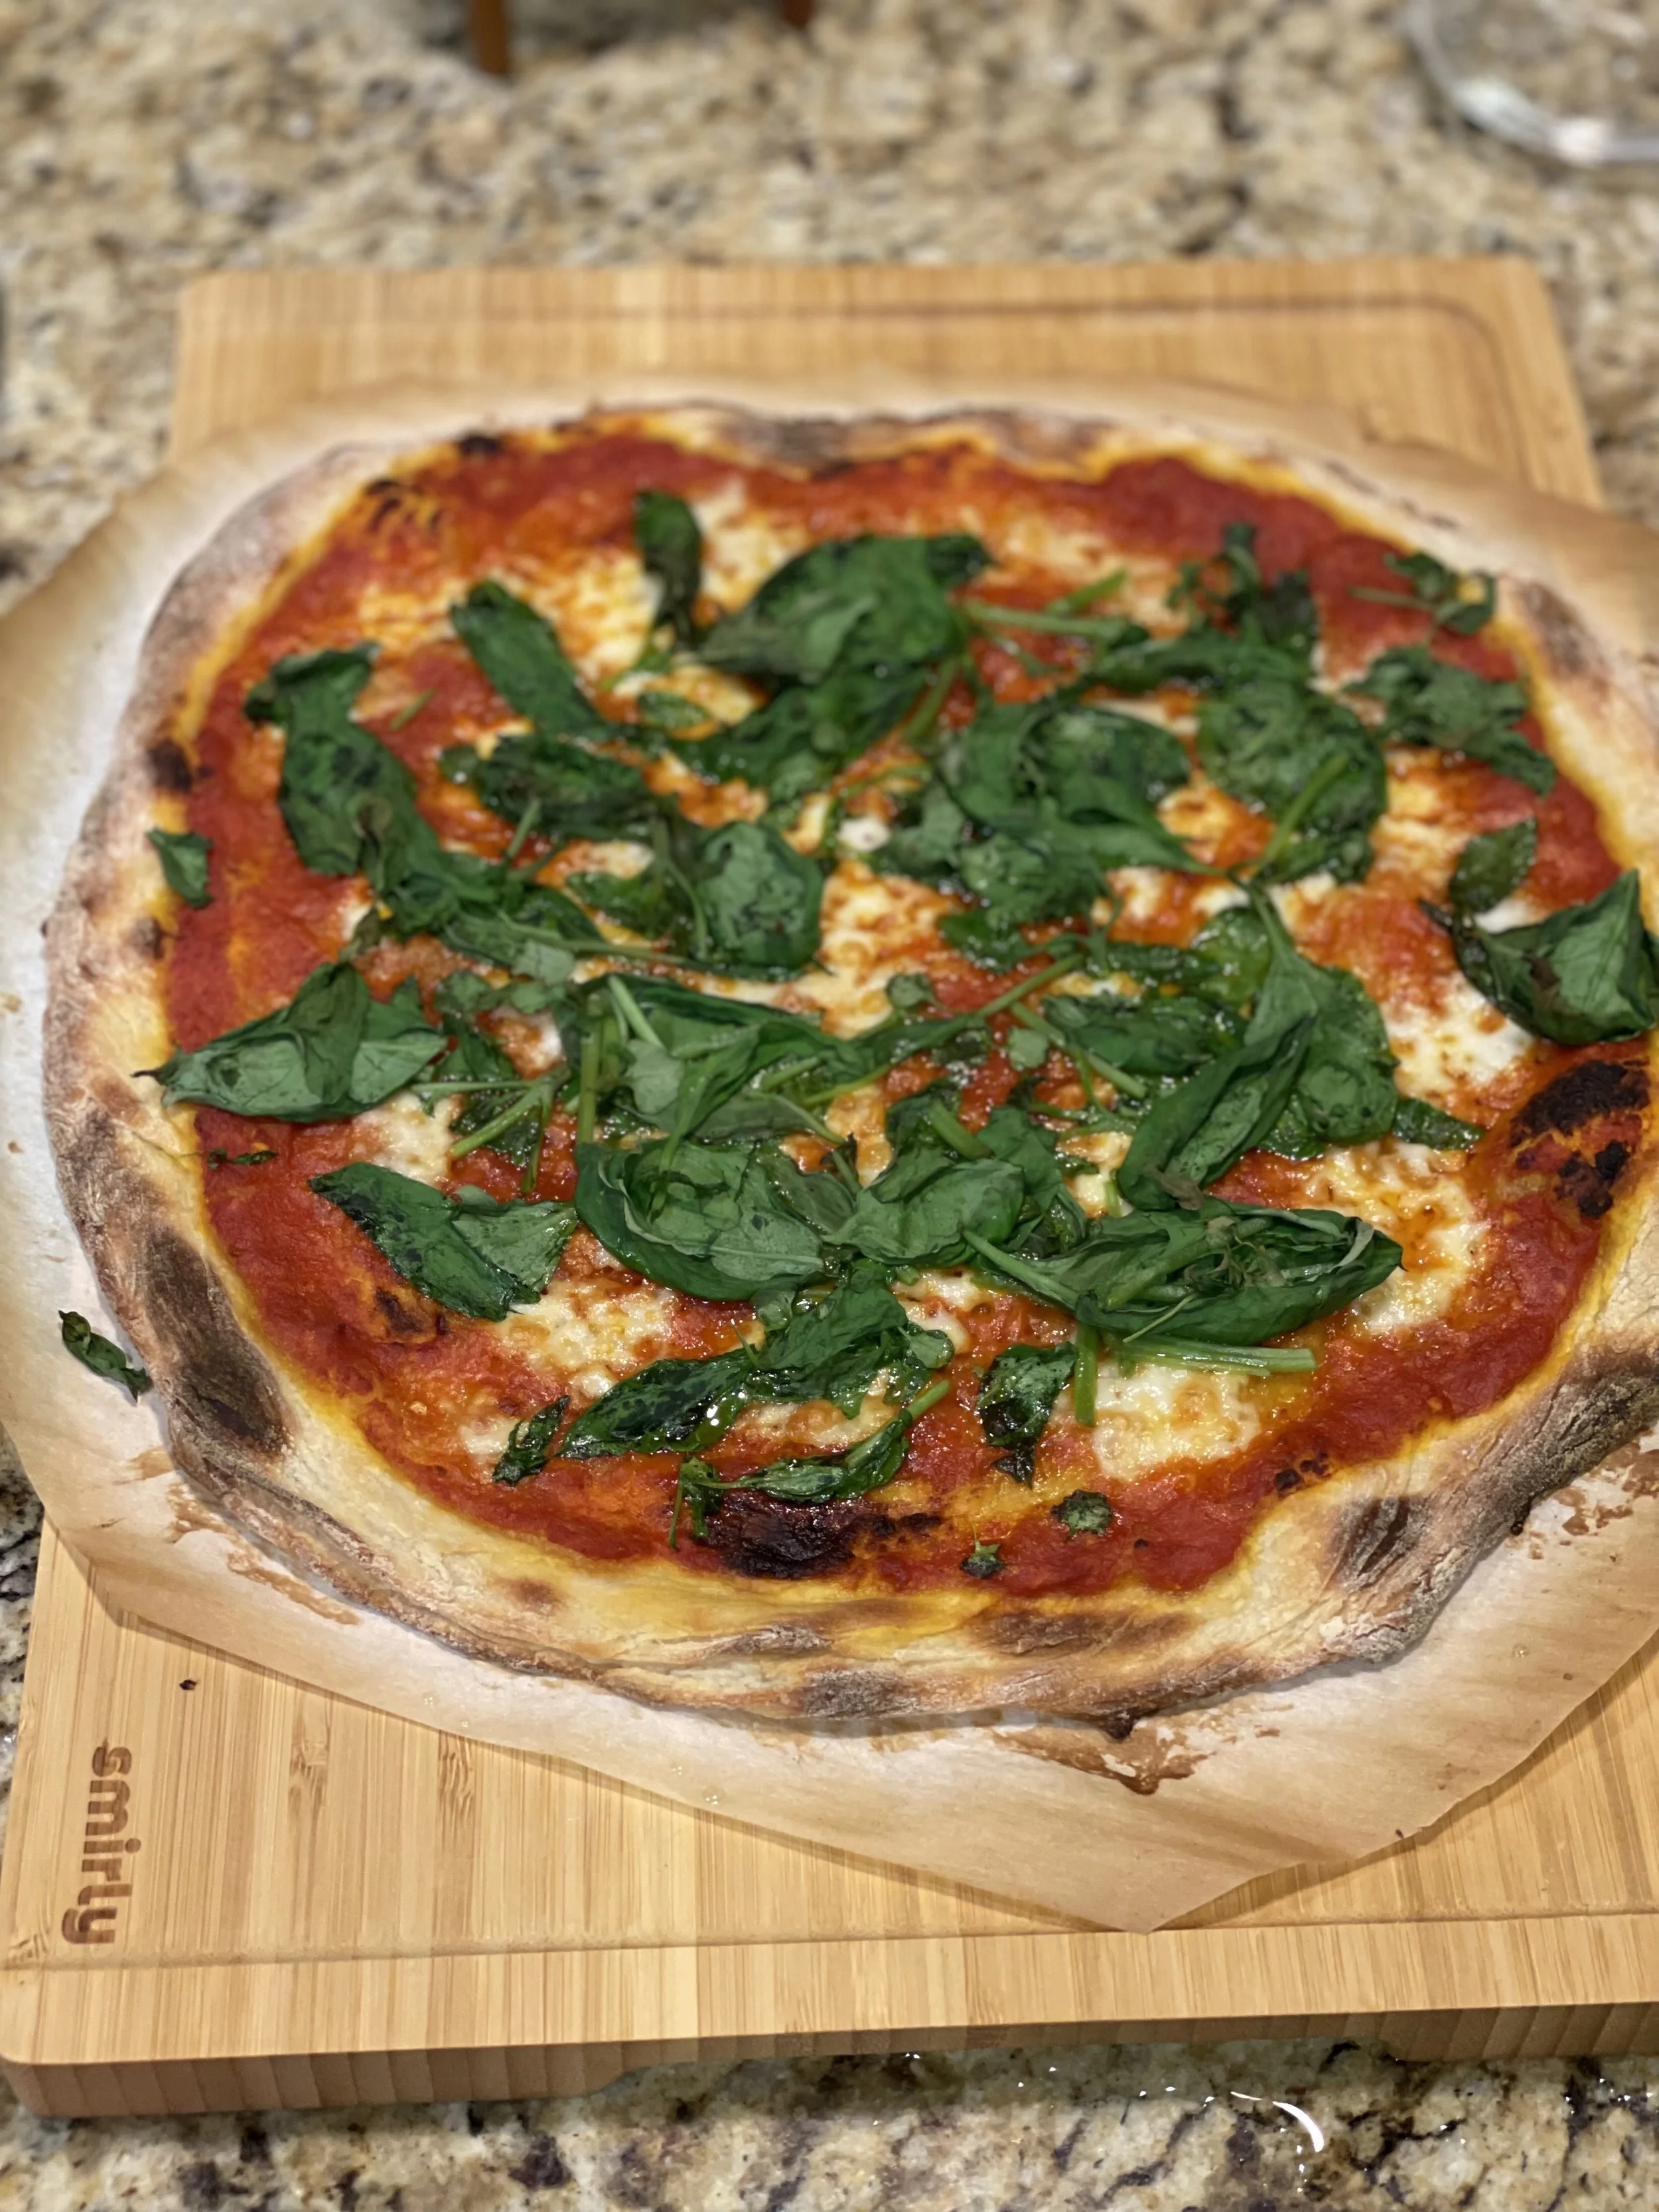
6. Add 1-2 spoons of tomato sauce to the top of the shaped dough (less is usually more here), then crumble 1/2 of the drained mozzarella ball onto the top. Drizzle 1 TBS olive oil over the entire cheese/tomato sauce/shaped dough.

7. Gently slide entire parchment paper - with uncooked pizza on top - on to the pizza stone and set a timer for 9 minutes. Cooking your pizza with the parchment between the dough and the stone will reduce the risk of sticking, burning, and not being able to beautifully remove the pizza from the stone.

Can I get a “Hell Yum”?

I hope you enjoyed this article, and enjoy your homemade sourdough pizza even more! Please feel free to ask any questions, and spread the love by sharing or pinning this post.
PIN ME FOR LATER

Disclosure: This post may contain affiliate links to products for your convenience, such as to items on Amazon. I may gain a small commission from purchases made through those links, at no additional cost to you. Thank you for supporting my blog!